

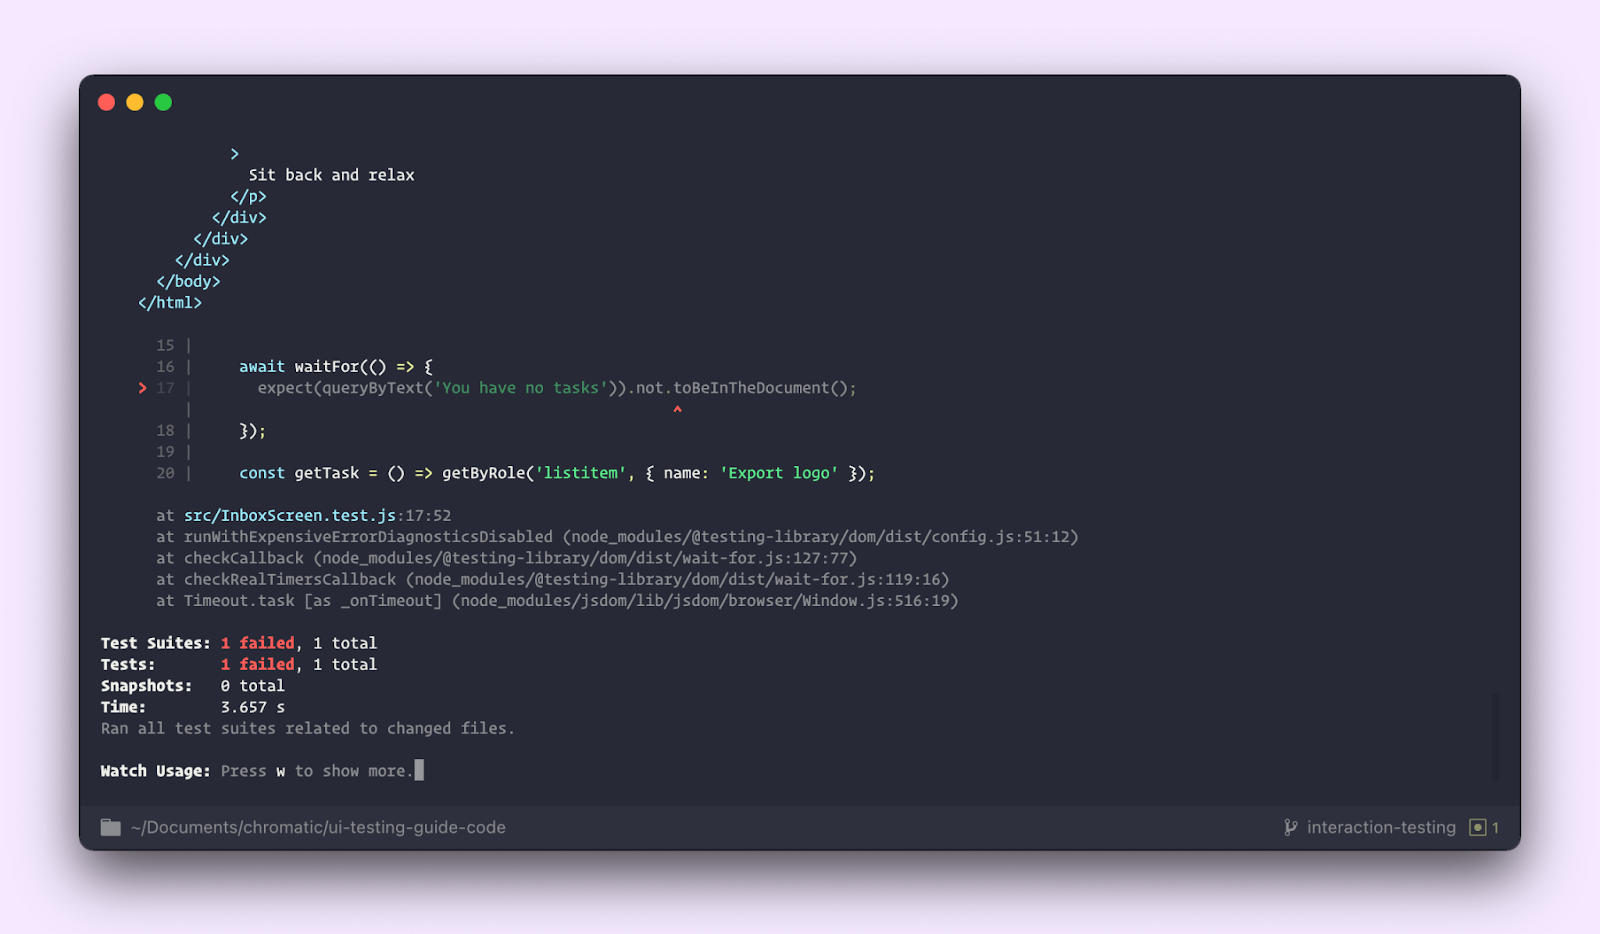

Components fetch data, respond to user interactions, and manage app state. To verify this functional behavior, developers rely on automated tests. But most testing tools are Node and JSDOM based. That means you’re forced to debug visual UIs in a textual command line.
At Storybook, we’re improving component testing by using the browser to run tests. Over the past six months, we introduced several features—play function, test-runner, assertion library—to make this a reality. This article walks through the entire Storybook interaction testing workflow.
How does component testing in Storybook work?
Testing interactions is a widespread pattern for verifying user behavior. You provide mock data to set up a test scenario, simulate user interactions using Testing Library, and check the resultant DOM structure.
In Storybook, this familiar workflow happens in your browser. That makes it easier to debug failures because you’re running tests in the same environment as you develop components—the browser.
Start by writing a story to set up the component’s initial state. Then simulate user behavior such as clicks and form entries using the play function. Finally, use the Storybook test-runner to check whether the UI and component state update correctly. Automate testing via the command line or your CI server.
Tutorial
To demonstrate the testing workflow I’ll use the Taskbox app—a task management app similar to Asana. On its InboxScreen, the user can click on the star icon to pin a task. Or click on the checkbox to archive it. Let’s write tests to ensure that the UI is responding to those interactions correctly.
Grab the code to follow along:
Setup the test-runner
We’ll start by installing the test-runner and related packages (note, it requires Storybook 6.4 or above).
Update your Storybook configuration (in .storybook/main.js) to include the interactions addon and enable playback controls for debugging.
Then add a test task to your project’s package.json:
Lastly, start up your Storybook (the test-runner runs against a running Storybook instance):
Write stories to set up a test case
The first step of writing a test is to set up a scenario by providing props or mock data to a component. That’s exactly what a story is, so let’s write one for the InboxScreen component.
InboxScreen fetches data via /tasks API request, which we’ll mock using the MSW addon.
Write an interaction test using the play function
Testing Library offers a convenient API for simulating user interactions—click, drag, tap, type, etc. Whereas Jest provides assertion utilities. We’ll use Storybook-instrumented versions of these two tools to write the test. Therefore, you get a familiar developer-friendly syntax to interact with the DOM, but with extra telemetry to help with debugging.
The test itself will be housed inside a play function. This snippet of code gets attached to a story and runs after the story is rendered.
Let’s add in our first interaction test to verify that the user can pin a task:
Each play function receives the Canvas element—the top-level container of the story. You can scope your queries to just within this element, making it easier to find DOM nodes.
We’re looking for the “Export logo” task in our case. Then find the pin button within it and click it. Finally, we check to see if the button has updated to the unpinned state.
When Storybook finishes rendering the story, it executes the steps defined within the play function, interacting with the component and pinning a task—similar to how a user would do it. If you check your interactions panel, you’ll see the step-by-step flow. It also offers a handy set of UI controls to pause, resume, rewind, and step through each interaction.
Execute tests with test-runner
Now that we have our first test down, we’ll also add tests for the archive, edit and delete task functionality.
You should now see stories for these scenarios. Storybook only runs the interaction test when you’re viewing a story. Therefore, you’d have to go through each story to run all your checks.
It’s unrealistic to manually review the entire Storybook whenever you make a change. Storybook test-runner automates that process. It’s a standalone utility—powered by Playwright—that runs all your interactions tests and catches broken stories.
Start the test-runner (in a separate terminal window): yarn test-storybook --watch. It verifies whether all stories rendered without any errors and that all assertions are passed.
If a test fails, you get a link that opens up the failing story in the browser.
You’ve got the local development workflow sorted. Storybook and test-runner run side-by-side, allowing you to build components in isolation and test their underlying logic in one go.
Automate Storybook interaction tests
Once you’re ready to merge your code, you’ll want to automatically run all your checks using a Continuous Integration (CI) server. You have two options for integrating Storybook interaction tests into your test automation pipeline: by using the test-runner in CI or combining it with visual tests using Chromatic.
Run test-runner in CI
You can build and serve the Storybook on your CI server and execute the test-runner against it. Here’s a recipe that uses concurrently, http-server and wait-on libraries.
You can also run tests against a published Storybook. For more on that and other CI configuration options, refer to the test-runner documentation.
Combine interaction and visual tests using Chromatic
Catching unintentional UI changes has always been a challenge. A line of leaky CSS can break multiple pages. That’s why leading teams at Auth0, Twilio, Adobe, and Peloton rely on visual testing. Chromatic is a cloud-based visual testing tool purpose-built for Storybook. It can also execute your interaction tests.
Chromatic works by capturing an image snapshot of every story—as it appears in the browser. Then when you open a pull request, it compares it to the previously accepted baseline and presents you with a diff.
Chromatic supports Storybook interaction tests out-of-the-box. It waits for the interaction test to run before capturing the snapshot. This way, you can verify both the visual appearance and the underlying logic for a component in one go. Any test failures get reported via the Chromatic UI.
Here’s a sample workflow for running Chromatic using Github Actions. For other CI services, refer to the Chromatic docs.
Test components in the browser with Storybook
Components aren’t static. Users can interact with the UI and trigger state updates. You have to write tests that simulate user behavior to verify this behavior.
Storybook interaction tests is our vision for what component testing should be: fast, intuitive, and integrated with tools you already use. It combines the intuitive debugging environment of a live browser with the performance and scriptability of headless browsers.
[“source=storybook”]